Sunday, November 24, 2013

Continuing the First Floor Framing

Work continues at a rapid pace on the first (ground) floor framing. The studs are in place for all the external first floor walls and some of the internal wall studs are also in place. Here's a view of the uphill/west exterior wall including the openings for the dining area window as well as the fireplace.


Here's Stanley working in front of the fireplace nailing the wall to the floor. Once the wall has been trued then it will also be bolted onto the foundations (I was relieved to hear).


Here's a view from the back towards the front of the house looking at where the kitchen and kitchen counter will be:


Here's Julia standing at the back door:


Again a view from the front to the back looking towards the front door. The stairs will be on the left of the picture underneath which will be the downstairs cloakroom:


Here's Jon standing in what will be his study/music room:


It's pretty impressive that Greg and Stan are doing the entire framing on their own. This frequently involves them installing supporting beams some of which are very heavy. The supporting beams are typically 6 inch x 12 inch plus depending on span (and presumably load) and the heaviest beams I have ever set (building the arbor at our last house) were 6 inches by 6 inches and that was hard enough. So to give some idea how they get these things installed, here's a sequence of them in action. The trick is to do it in stages by gradually raising each end onto a ladder or 2 x 6 cross pieces temporarily nailed into place.
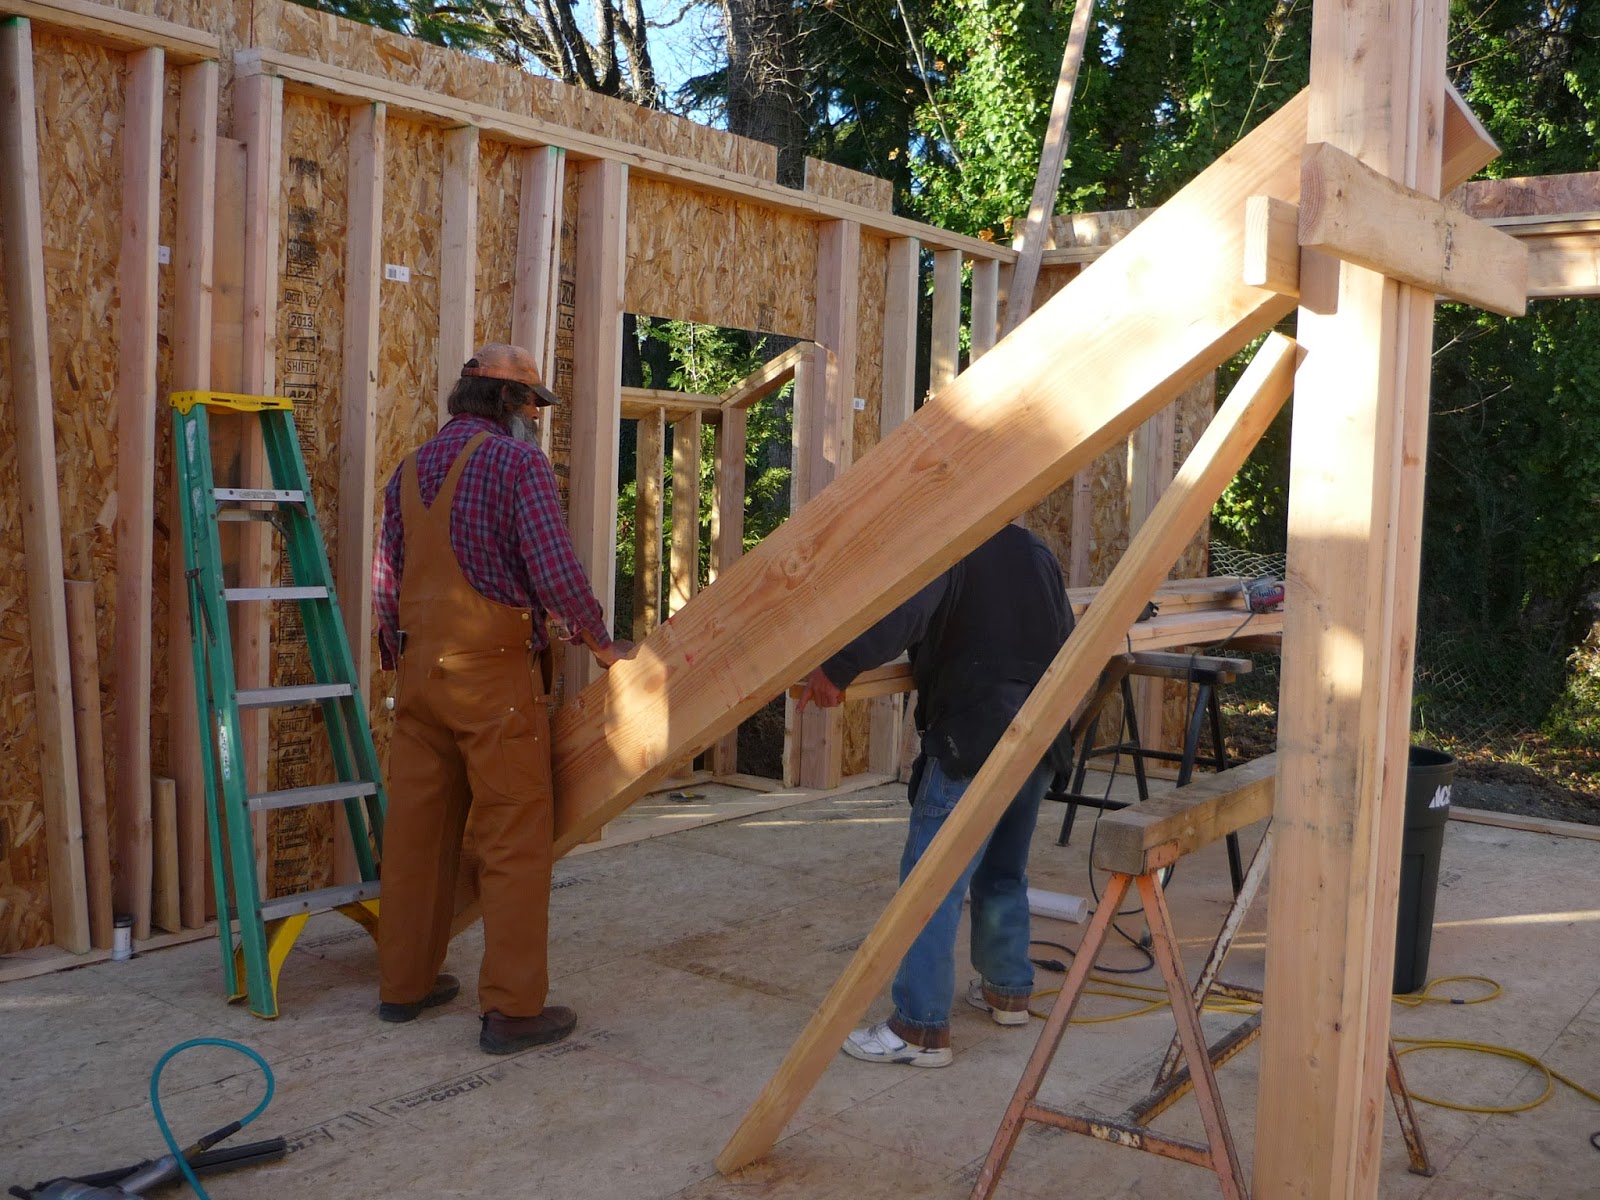


Simple eh?


Wednesday, November 20, 2013

First Floor Framing

Coinciding with the arrival of some sunny weather, Greg and Stanley began the framing for the first floor. The framers are some of the stars of house construction because after what seems like months of nothing going on, except a process of digging big holes in the ground and then filling them in again, suddenly things start to make vertical progress. Now the house is really beginning to look like, well, a house! Here's the view from the front:


We now have a back door and a back window. It's still a bit drafty though.


Here's a view of the kitchen to be from the garage:


And here's a view from inside the garage to be:


I am expecting some rapid progress from here on because Greg and Stanley are really rocking and there are daily deliveries of piles of assorted lumbar. The lumber is coming from Parr Lumber in Albany and it goes without saying that the lumber is from Oregon.


Monday, November 18, 2013

First Storey Flooring

Greg and Stanley were putting in the flooring for the first storey this morning:


The 2x6 wood for the frame structure was also delivered.

Thursday, November 14, 2013

Inspection Day

Today was inspection day by the City for the foundations, ground level framing, bracing and plumbing. Everything seemed to go smoothly and the work passed inspection.

Here's Paul the Inspector who was checking out the foundations and framing/bracing work:


Here's the cantilever support structure for the breakfast nook. The nook is part of the kitchen area and projects out behind the house providing (hopefully) a lovely view into the oak grove while eating breakfast cereal!


I had originally assumed the 12 x 6 composite beam across the middle of the house was a load bearing beam, but it turns out I was wrong. It is in fact a Drag Beam and although it will provide some load support, it's principal role is to provide lateral seismic stability to the structure in the event of an earthquake. Here it is:


It seems a lot of the engineering that has gone into the foundation design has been to address seismic concerns, which are much higher on the agenda than I had anticipated for this region, as well as the sloping ground and soil composition. I have been assured by Richard the builder as well as Paul the inspector that our house "is not going anywhere... ever!" It looks as though if anyone wants to put our house in the Corvallis Outdoor Historic Museum a couple of hundred years hence, then they are going to have to build the museum around the house.


Plumbing and Heating

The last couple of days the heating and plumbing teams were working on the house to install the lower level pipes, drains and ducts. Here are the plumbers in action:


All the piping is plastic with what appear to be push connectors for hot and cold and glued connectors for the drains/sewer lines. Certainly seems a lot easier than copper piping and I understand it works very well. Here's part of the sewer lines with a ventilation pipe that will extend to the roof.


The heating ducts have also been installed along with the main junction box into the gas furnace. Here's the junction box in the garage:


Here are some of the black underfloor ducts that are already wrapped in insulation. It's a forced air heating system and these ducts carry the warm air to different parts of the house.


Tuesday, November 12, 2013

Pony Walls and Floor Beams

Next step in the framing process is to install the pony walls that support the floor beams. Here's the first one that runs from the front to the back of the house.


Here's the second one, also running front to back, which provides the extra suuport for the long run across the back of the house. The protruding metal bracket will connect to a load bearing beam that will be installed across the middle of the house.


Here's the beam (it's pretty heavy!)


Once the poney walls are in place, Greg and Stanley (the framers) can begin to set the cross beams (I Beams) in place:


The I Beams support the floor, so they have to be level. Greg and Stan have some pretty impressive spirit levels for which this picture doesn't really do justice, but you get the idea...


Thursday, November 7, 2013

Richard the Builder

Here's our Builder, Richard. It may look like we are discussing some aspect of the construction, but in fact we were talking about cricket.


Framing Begins

While filling in continues, framing has just begun on the house. First the wooden base layer is put into place atop of the foundations with a foam underlay. A plastic liner has been installed in the crawl space which will act as a moisture barrier (at the moment it's just collecting rain!)


The brackets attached to the frame base layer will hold the 'I' beams that support the floor.


Here are the 'I' beams prior to installation. Made out of laminated wood/compression board, they seem quite flimsy when flat but are very strong when weighted from the side.


Filling In The Foundations

Now the foundations are complete, a lot of the soil that has been removed during excavating and grading has to be replaced. This is done with quarry rock that comes pre-washed to improve compaction and drainage. The rock is brought in from a local quarry in Kings Valley and we expect to need about twelve truck loads:


First task is to level the ground leading to the garage:


Next the rock can begin to be distributed into the garage area to provide the bedding for the concrete floor. Eventually, the whole area needs to be raised to within three inches of the lip. 


The buried white pipes are the drains from the roof gutters that will route the water round to the back of the house. From there it will have to be pumped back up to the street and into the storm drain in order to prevent excess water getting into the protected oak tree roots at the back of the property. People really care about trees here!


Hhmm that's getting to be quite a rock pile!


Forms Removed & Foundations Complete

Here are the completed foundations with the forms removed.


 The low lying foundation elements running from front to back are footings that will distribute the load from wooden pony walls supporting the floor.


 The garage area to the east (downhill side) will be completely filled in with quarry rock to carry the 3 inch concrete floor.